Author: johnkassell
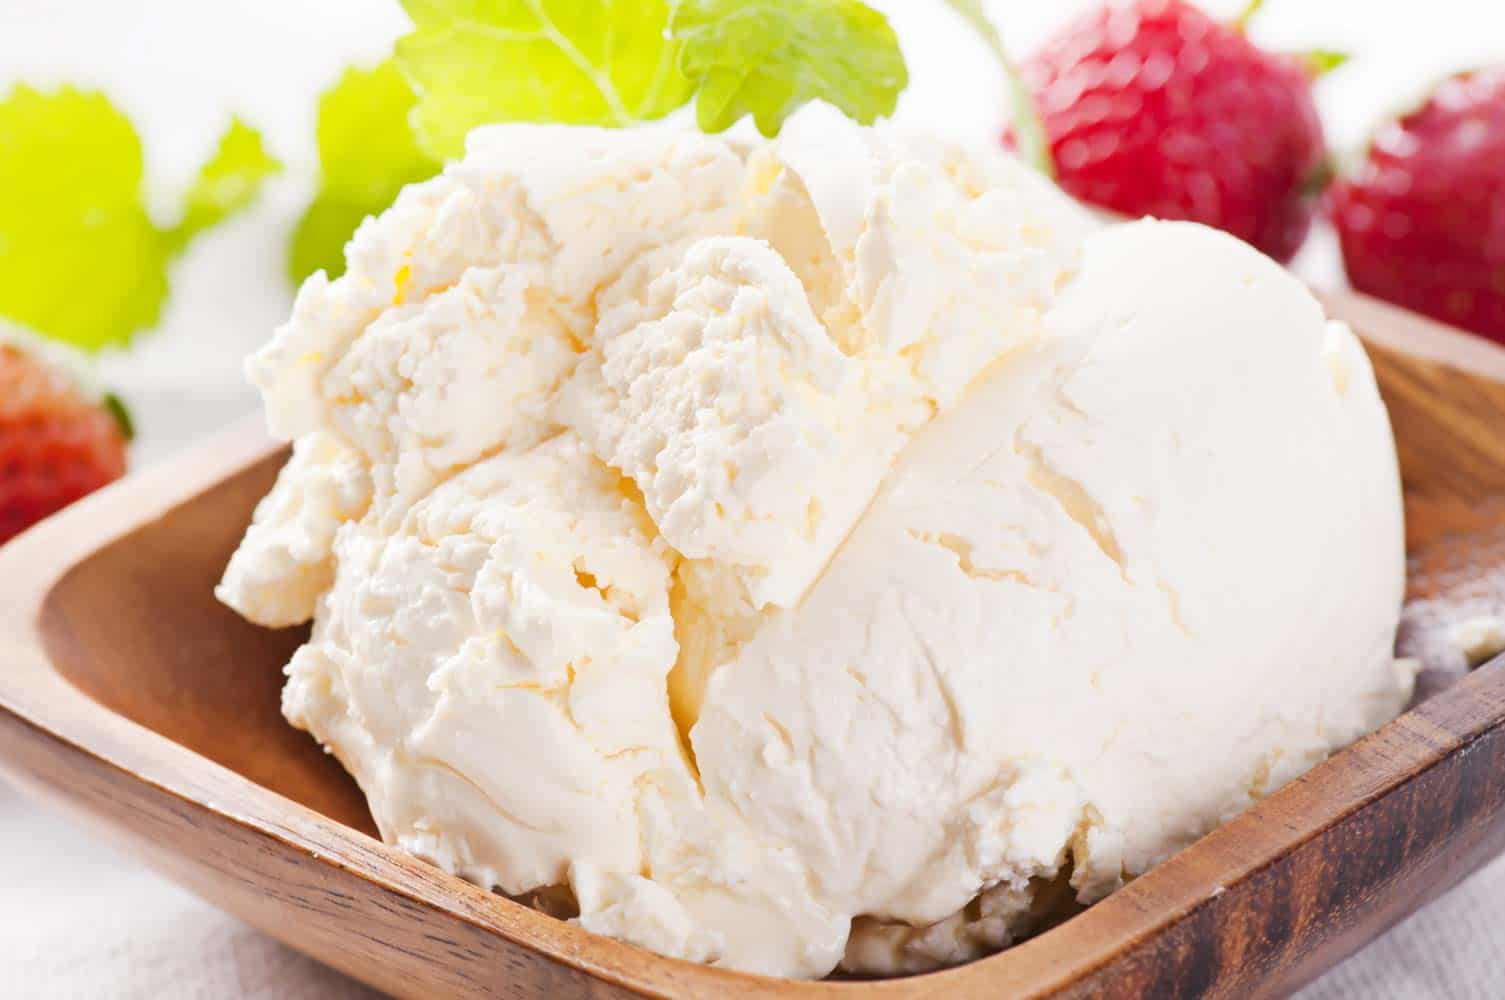
Making Something Different: Chaource Cheese
The name of this cheese alone is interesting, not to mention its unique flavor and form. You may never have heard of it, which makes it even more worth a try on firstly pronouncing (shah-oose) and then creating it!
Chaource is a mold-ripened cheese that originates from a small village in France called Chaource. It is usually made with both raw and pasteurized cow’s milk.
The rind of these cheese is similar to Camembert and has the same texture that just melts in your mouth. It can be aged for 2 weeks to 2 months and the flavor flourishes with time.
Down below is a big recipe for around 8 blocks of cheese, but you can easily half it if you so desire.

Recipe
What You Need
2 Gallons whole milk (can be pasteurized, but not ultra-pasteurized)
1/4 Tsp Mesophilic culture
1/8 Tsp Aroma Type B
1/4 Tsp Penicilium candidum
1/16 Tsp Geotrichum candidum
2 drops Animal rennet
Cheese salt
1/4 Tsp Calcium chloride
Equipment
8 Crottin molds
Thermometer
Butter muslin
Colander
Scoop or ladle
2 Bamboo ripening mats
Ripening box
Cheese wrap
What To Do
First things first, it is important that you sanitize every piece of equipment that will be used, including the ripening box.
Now dilute 1/4 tsp calcium chloride in 1/4 cup of non-chlorinated water and add this to the milk.
Heat the milk up slowly to 77F, checking the temperature with your thermometer.
Once the milk is warmed up, sprinkle all 4 cultures onto the milk and let it hydrate for around 3 minutes.
After 3 minutes, begin to stir the cultures for about 20 seconds into the milk.
Now cover the pot with a lid and let the milk ripen for around 8 hours, making sure the temperature stays at 77F for the entire period. If you are heating the pot with water, you might have to add hot water half way through the ripening to maintain the heat.
Add 2 drops of rennet to the milk and stir it in slowly for around 10 seconds.
Now cover the pot and allow it to sit for a further 8 hours, once again keeping the heat at 77F.
After the 8 hours is up, gently put the curds into a colander with a ladle, ensuring the colander is lined with butter muslin. Make sure you do not cut the curds. If you really wanted, you could skip this step and just ladle the curds directly into the molds but it can be quite difficult to get them all in.
Once in the colander, now ladle them into the 8 molds. Keep replenishing them as the whey drains from the molds.
If you would like to speed up the process of draining the whey from the molds, you can run a knife along the inside of the molds.
When the whey is getting to the bottom of the molds, empty the box. This step is important because the environment needs to be kept as dry as possible.
Let drain for around 48 hours. If the cheese seems firm enough, turn them around and put them back into the molds for 24 hours.
48 hours later, it is time to remove the cheeses from the molds and place them on wax paper or a paper towel whilst drying off the box.
Prepare your rack in the dry box.
Get each cheese and rub a thin layer of salt onto both ends of it. Be sure to wait a few minute between each end and then put each cheese into the box until they have all been salted.
Now close the lid on the box and place it in a space of 50-55F
Make sure you flip the cheeses every day and drain any whey in the bottom of the box.
The cheese will be ready to eat after 2 weeks of being in the box. If you are wanting to age them any longer, keep them in your cave with the lid ajar and make sure you flip them every day. Once you are ready to eat them, wrap them and place in the refrigerator. They’re best served at room temperature.
For All The Coffee Lovers Out There: Coffee Chocolate Truffles
Mmmm two of the best consumables in the world besides cheese- coffee and chocolate! Although coffee and chocolate is a common trend in foods, it is not easy to make perfectly delicious truffles especially when this recipe calls for you to use coffee instead of cream to make these lactose-free tastes of heaven.
In this recipe, it has been made with both 60 percent dark chocolate and high-quality milk chocolate. It is clear that dark chocolate wins overall as it produces an intensely flavored bonbon that is guaranteed to be mouth watering and a black coffee and dark chocolate addict’s dream come true.
However, if you prefer to put plenty of cream in your coffee and enjoy chocolate with less kick, making this recipe with milk chocolate will be better for you. All you have to do is reduce the coffee by 1/3 and use milk chocolate.

Recipe
What You Need
7 oz dark chocolate, chopped
1/2 tbsp. salted or unsalted butter
1/3 cup coffee or espresso, depending on how strong you want the coffee flavor (or 1 tbsp. and 2 tsp. if using milk chocolate)
1/2 cup unsweetened cocoa
What To Do
Firstly, put the chocolate into a bowl suitable for a blender. Place the coffee in a pan over medium heat until it is hot but not simmering and remove from the heat. Another method to heat the coffee can be placing it in the microwave for 30 seconds.
Pour the heated coffee over the chocolate and blend until the consistency becomes smooth.
Now add the butter and stir until the butter is well incorporated into the chocolate and coffee mixture. Make sure there are no lumps and that the chocolate is melted. Let the mixture stand at room temperature for one or two hours or until it has set and is firm.
Once the ganache is set, scrape a spoon across the surface. Dust your hands with cocoa and quickly press the truffle with your fingertips into 1 inch balls. Roll the balls in the cocoa until they’re well coated.
Now place the truffles on wax paper to set for several hours. You can store them in the refrigerator in an airtight container for around a week or freeze them for a month or so. Enjoy!
Using Tartaric Acid In Cheese Making
You can usually find tartaric acid in a lot of fruits, especially tamarind, from which tartaric acid is derived from a lot of the time. It is not only a product of cheese making though, it is also a by-product of the wine making process because it is also found in grapes.

We tend to use tartaric acid in making Mascarpone as it is an easy to make cheese and very inexpensive. It is perfect for beginners because it is consistent and works well.
It takes such a small amount of tartaric acid to make Mascarpone that when you use the full 1/4 teaspoon, there is enough to create Mascarpone 95 times from a 4-ounce packet of it. (Perfect for Tiramisu lovers!)
To make around 10-12 ounces of Mascarpone, food grade tartaric acid is used. All you have to do is add 1/4 teaspoon of tartaric acid to a quart of milk and cream or around 1/8 teaspoon for if you are using raw cream.
Recipe For Mascarpone With Tartaric Acid
What You Need
1/8-1/4 teaspoon tartaric acid
1 quart light cream or half-and-half
What To Do
1. Heat the cream to 185F in a double boiler.
2. Add the tartaric acid and stir it into the cream for several minutes. The mixture will begin to thicken into a cream of wheat consistency, with tiny flecks of curd forming. Don’t worry if the cream doesn’t seem to coagulate, just add some more of the remaining tartaric acid and stir for another 5 minutes. Just be careful not to add too much tartaric acid, or the texture will become grainy.
3. Now line a stainless-steel colander with a double layer of butter muslin. Begin to ladle the curd into the colander and drain for an hour.
4. Once that is completed, place the finished cheese in a covered container and refrigerate for up to 2 weeks. Enjoy!
The Cheesemaking Process For Tomme au Marc
This cheese is usually found in Italy and France. Tomme is made and buried in the seeds and skins of wine making and from these skins, a liquor is also made in the name of ‘Marc’, which explains where ‘Tomme au Marc’ comes from.

What You Need
In this recipe, we use 8 gallons of milk and with that you also need:
– MA 011-Mesophilic Culture 1/8 Tsp
– TA 011-Thermophilic Culture 1/16 tsp
– Single strength Calf Rennet 11 ml (~2.25 tsp)
What To Do
To begin, heat up the milk to 91F and add the first culture and ripen for 45 minutes.
After 45 minutes, add enough rennet so it sets within 12-18 minutes and cut the curd into a small size (roughly 1/4 in.).
Now stir the mixture for around 10 minutes and slowly increase the temperature to 98F over the course of 30 minutes.
You can now continue to stir the curd until the TA% rises to .12. This will ensure that the curd is sweet but acidity will begin to develop in the molds.
Make sure you prepare the molds with warm water or whey being poured into them before transferring the curds. This will ensure clarity of the whey which means there was very little fat lost during handling.
After a few minutes of filling the molds with the curds, you can flip them and place them back into the molds. This makes the surface come together fairly quickly.
Now add around 8lbs of weight for around 30 minutes. After those 30 minutes, flip and place the molds again, making sure the temperature stays at a range of 90-95F to help the culture do its job.
Add around 25lbs of weight for 4-6 hrs. After this period, the surface should have formed really well and the acid will be developing nicely to a pH of 5.6
You can now leave the cheese to develop mold overnight and the pH should have lowered to around 5.3 in the morning.
It is time to brine your cheese for around 12 hours. The choice of brine is yours and after it is completed, take your cheese to the aging room and leave it for a week or so to allow the surface to firm up a lot more.
After a week or two, the tommes are ready to be buried in the Marc and anointed with a delightful splash of merlot.
Seal the top off and put it to rest in a cool room at a temperature or around 50-60F for at least 2 months before you take it out.
Once this is done, the tomme will be bursting with skins and seeds embedded within it. Keep them on the cheese and allow the tomme to dry out for a few more days, making the surface quite soft at this stage.
All this work is definitely worth it, the complexity of this cheese is perfection. The flavor of the wine and skins being a key aspect of the flavor and texture profiles. Enjoy!
Have You Ever Tried Brie Pie?
This rich and luxurious pie is not your average pie. In fact, pies in the U.S are usually eaten for dessert, but Brie pie is more of an appetizer or entree.

Luckily, like a lot of the delicious appetizers on offer, this one is fairly simple to create and has an amazing payoff. It may look quite difficult, but it only entails wrapping a wheel of brie in a thawed sheet of puff pastry and cooking it until golden. Even if it was difficult to create, the combination of warm melted cheese inside of a crispy pastry is impossible to resist and worth every effort.
The type of Brie you get isn’t too important, a rule of thumb would be to buy one that fits your hand and looks good to wrap in pastry.
Let’s get right to it and create this cheesy masterpiece!
Recipe
What You Need
8 oz of Brie
1 sheet puff pastry, thawed
All-purpose flour
1 large egg, beaten
What To Do
Firstly, preheat oven to 400 F, making sure the oven rack is in the middle of the oven. Now line a baking sheet with parchment and set it aside.
Start by rolling out the puff pastry, using the flour to dust out on the counter and then sprinkle some more flour on top to the pastry to aid rolling further. Roll the pastry so that it measures around 11 x 11 inches to make sure it fits around the Brie.
Now it is time to wrap the brie in pastry. Place the wheel of brie in the middle of the pastry and fold the corners over the brie, creating a neat package. Press against the edges gently and neaten the sides up.
Brush the pastry over with the beaten egg, making sure you get the sides and transfer the pie to the baking sheet.
Bake the pie for around 35-40 minutes or until golden brown.
Now allow cooling for 5 to 10 minutes which will give the hot cheese time to firm up.
Transfer it to a serving platter and serve it warm.
Try Something Deliciously Different: Baked Tomatoes Stuffed With Goat Cheese Fondue
This simple recipe is perfect for the summer, combining fresh goat cheese and mascarpone in a fondue melt with ripe, juicy tomatoes. Just imagine sitting out in the sunshine having a cookout with all your friends and family, this will be the perfect dish to bring! It is different, impressive and easy to make, so give it a try and enjoy!

Recipe
What You Need
3 large, firm tomatoes
3 tbsp. mascarpone
3 tbsp. goat cheese at room temperature
Kosher salt
1 tbsp. virgin olive oil
1 tbsp. unsalted butter
2 anchovies, chopped finely
2 garlic cloves, chopped finely
Ground black pepper
1/4 cup panko or other bread crumbs
What To Do
Firstly, preheat the oven to 500 F.
Now slice a thin layer off the bottoms of tomatoes so they will easily stand upright and then remove the insides of the tomatoes, carving them out to up to about 3/4 inch from bottom and sides. Be careful not to take out too much of the insides so that the tomato will stay upright when cooked.
Now, using the salt, season each tomato. After this, mix the goat cheese and mascarpone together in a small bowl.
It is now time to prepare the topping. Firstly, melt the butter with the oil over medium high heat. Add the anchovies, garlic and cook for 30 seconds while stirring. Now stir in the bread crumbs and cook for 2 minutes. Season with pepper.
Fill the tomatoes with the mascarpone mixture and top them off with bread crumbs. Now place the tomatoes on a baking sheet and bake them for about 10 minutes or until golden.
7 Rules To Live By When Dealing With Cheese
1. A very important and fairly obvious rule is to not put unwrapped cheese in the fridge. The cheese would not only be exposed to potential bacteria, but it would become hard and dry out, making it inedible.

2. Don’t wrap your cheese in saran wrap! Although it is a very common practice to wrap cheese in saran wrap, with it being the easiest way to repackage food, replacing it with cheese paper or baking paper is the best way to go. This is because the paper allows the cheese to breathe and it won’t dry out.

3. It is also important to use separate utensils for each cheese. It may not seem very important but when you are eating a variety of cheese from a board, it can definitely affect the taste and ruin the experience of all the delightful flavors to offer.

4. Never serve cheese straight from the fridge. Like red wine, you just simply are not getting all from that expensive treat you bought if it is consumed straight from the fridge. It’d be an unpleasant, stone cold rock, with a lack of flavor, aroma or texture. For example, if you were to eat brie straight from the fridge, it would be hard and lacking flavor, whereas after being left out for around an hour, it is soft and delicious.

5. Don’t freeze fresh cheese. Fresh cheese is volatile as it is and just after one day, fresh cheese like feta and mozzarella will start to lose their moisture and become rubbery. The best way to remedy this is to soak the cheese for an hour in warm, salted milk. This will bring back the moisture and burst of flavors you lost while refrigerating.

6. Buying grated cheese isn’t the best idea, nor the cheapest. When you buy a full block of cheese, it keeps fresher for a lot longer and is a lot cheaper. Not only that but a block of cheese tends to be a lot better quality than grated, with more flavor and aroma and no artificially added extras.

7. Try to keep cheese in a block for as long as possible. Cutting cheese into slices allows the cheese to dry out fast. Even when serving it on a platter, it is best to keep it in a block so the cheese can be enjoyed in its best form, especially since the most flavor is at the center of the cheese.

Creating Mouthwatering Halloumi
Halloumi originates from the island of Cyprus and tends to be a semi-hard, unripened, and brined cheese. It is unique for having a high melting point which means it can be easily grilled or fried- perfect for summer cookouts! What makes it better is because it doesn’t melt, it keeps its texture and shape, keeping the incredible flavor and soft insides.
Although Halloumi has been around for a long time, it is particularly getting more popular over in the western countries because there has been a rise in vegetarians, it acts as a delicious meat substitute.
This cheese is traditionally made with ewe’s milk and added cow’s milk, but it is perfectly fine to make it with just 100% cow’s milk since that is more readily available. You can even substitute the milk for your own desired type. In this recipe though, 1 gallon of cow’s milk will be used for a trial run to see if you enjoy the cheese, ingredients can easily be adjusted to fit the amount of milk you would like to use.

Recipe
What You Need
1 Gallon of Milk (not ultra-pasteurized)
1/4 Tsp Single Strength Liquid Rennet (1/8 tsp for raw milk)
1 Pack C21 Buttermilk Culture or 1/4 tsp MA4002 (no culture for raw milk)
3/8 Tsp Calcium Chloride for Pasteurized Milk
1/8 Tsp Citric Acid (for Whey Ricotta)
1/2 oz Salt
Equipment
Knife to cut curds
Large colander
Ladle or spoon to stir curds
Thermometer
What To Do
1. To begin, place your milk in a pot and heat it to around 88 degrees F. Be sure to hear slowly and stir well if heating on a stove.
Once your milk has reached the desired temperature, add the culture. The culture will be destroyed by the milk and the curds will become higher in temperature. However, they will provide special enzymes for ripening if the cheese is preserved for a short period of time.
Also, if you are adding calcium chloride or lipase, add them in this step and stir to incorporate it well into the milk.
2. Now, add the liquid rennet to a diluted 1/4 cup of water. This will begin the coagulation process. It will take approximately 30-40 minutes for total coagulation but you will notice the milk begins to thicken within 20 minutes.
3. The curds can now be cut to .75- 1.5 inch squared in a vertical manner. Then allow to stand for 5 minutes to heal and then using your ladle, cut horizontally into even sized cubes.
4. Time to cook the curds and remove the whey. Stir gently, increasing the heat slowly to 100 degrees F during 20-30 minutes.
Keep this temperature for another 20-30 minutes while stirring every 3-5 minutes.
Once that time period is over, allow the curds to settle for 5 minutes under the whey.
Cooking the cheese in hot whey is very important for the making of Halloumi, so beginning to filter off the whey from the curds is the next step. You can do this with a sanitized colander and just scoop the whey out with a ladle, cup or bowl.
Now that the whey has been separated, slowly heat the whey to 195 degrees F, without letting it boil.
5. The curds which are dry can be transferred to their form from draining. Light pressure from your hands will help the consolidation of curd and make more than 1 form, they can be stacked and reversed for a little weight.
You can allow the curds to rest with a little weight, stalking them in forms. Make sure you turn them at 20-minute intervals to form a well-consolidated cheese.
6. After the whey has been heated, it is time to give the Halloumi its true form by heating the whey for 30-40 more minutes, keeping it at a temperature of 195 degrees F for the time it takes to cook all the pieces of Halloumi. Use a ladle to keep the cheese off the bottom of the heating pot and then lower it into the whey. At first, the cheese will float to the bottom, but as it cooks, it will eventually float to the surface.
Once it floats, that means it is ready to be removed. Cool the cheese for a few seconds in cold water and then lay it on a draining mat to cool and drain a bit more.
7. While you are cooling the cheese, and it is still warm, flatten with your hand to form a larger, flatter disc of cheese.
Now finish it off by sprinkling the cheese with salt and folding it into a crescent and pressing slightly as it cools.
8. Now your cheese is done, after a 3-5 day process. You can keep it refrigerated if it is lightly salted. If you are wanting to store it more traditionally, at room temperature, the higher amount of salt will keep it well for several days.
This Coeur A La Crème Is To Die For!
Every now and then you just want something a little different to satisfy your cravings. Perhaps you’re planning a meal with your significant other or maybe you’re just in the mood for dessert. There really is no better plate to took into than Coeur a la Crème with delicious strawberries smothering it. The name Coeur a la Crème literally translates from French to “Heart of the cream”, that’s how you know it’s gonna be good!
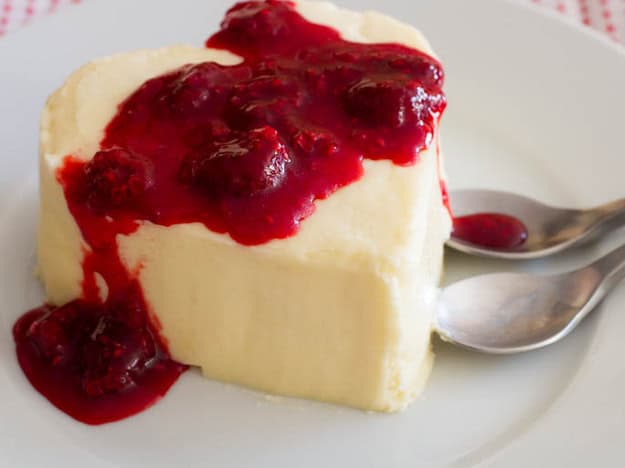
Although there are many different variations of this particular dessert, this has got to be one of the best. It not only satisfies your sweet tooth, but it is satisfying for us cheese lovers too!
If you want to get all romantic with it, you can use a heart shaped mold to really top off this dessert.
Recipe
What You Need
– 1 tbsp granulated sugar
– 1 tbsp heavy cream
– 1 cup fromage blanc
– 2 egg whites, beaten
What To Do
Firstly, combine the sugar, cream, and cheese. Then fold in the egg whites. You now spoon the mixture into a mold lined with a butter muslin and allow it to set in the fridge for 6-10 hours.
Once it is set, gently pull the butter muslin up to remove heat from the mold.
It is all up to you what to serve it with. From experience, enjoying it topped with strawberries and syrup or even melted chocolate can leave your mouth watering!
Delicious Lemon Blueberry Ricotta Cookies
These puffy lemon blueberry cookies are so soft that they are almost like a cake. These cookies are similar to cutting off the top of a muffin and eating it, it would be extremely similar in taste and texture.


