Blog

What is Trail Bologna, and Why We Love It
What is Trail Bologna, and Why We Love It
What is Trail Bologna?
Trail Bologna is a type of smoked ring sausage that hails from the small village of Trail, located in Ohio’s Amish Country. Known for its unique shape, rich smoky flavor, and all-beef content, Trail Bologna has become a beloved staple in Ohio households and a favorite across the Midwest.
Made with coarse-ground, lean beef and seasoned with a traditional spice blend, It is slow-smoked over hardwood, which gives it its signature flavor and deep color. Unlike typical store-bought bologna, Trail Bologna is dense, hearty, and free of fillers—perfect for slicing, snacking, or serving on a charcuterie board.
The History Behind Trail Bologna
The original Trail Bologna was developed in the early 1900s by the Troyer family in Trail, Ohio. Their goal was to create a high-quality, preservative-free sausage that would stand the test of time. And it did—Troyer’s Trail Bologna is still made in Trail to this day, using the same time-honored methods.
Over the decades, the popularity of Trail Bologna has grown well beyond Holmes County. What started as a local specialty has become a sought-after delicacy for those who appreciate traditional meat craftsmanship.
Why We Love It
There’s something undeniably nostalgic and comforting about Trail Bologna. For many, it’s tied to family gatherings, road trips through Amish Country, or simple evenings at home with cheese and crackers.
We love Trail Bologna because:
- It’s made with 100% beef
- It has a smoky, savory flavor that’s hard to beat
- It pairs perfectly with sharp cheddar cheese and mustard
- It’s versatile—great for snacking, sandwiches, or appetizers
It’s also a popular choice for holiday gift boxes and party platters, especially when paired with local cheeses and preserves.
Where to Buy Trail Bologna
Authentic Trail Bologna can be hard to find outside Ohio, but thankfully you can order Trail Bologna online at Cheesehouse.com. We stock only the finest, freshly made bologna sourced from Amish Country producers.
Looking for a perfect pairing? Try it with our Amish Baby Swiss Cheese or add it to a Cheese Gift Box for a delicious Ohio-made treat.
Final Thoughts
Trail Bologna is more than just a regional specialty—it’s a tradition. Whether you’re a lifelong fan or trying it for the first time, this savory smoked sausage delivers an authentic taste of Ohio’s food culture.
Order your Trail Bologna ring today and experience why so many people can’t get enough of this local favorite.
Image Alt Text: “Sliced Trail Bologna ring with cheese and mustard on a rustic wooden board”
Pearl Valley Cheese Ohio: Tradition, Taste, and Swiss Excellence
Pearl Valley Cheese Ohio: Tradition, Taste, and Swiss Excellence
Nestled in the rolling hills of Amish Country, Pearl Valley Cheese Ohio has been a local treasure since 1928. Known for producing world-class Swiss cheese and a variety of award-winning dairy products, Pearl Valley is a shining example of what happens when generations of skill meet a passion for tradition.
A Family-Owned Legacy Since 1928
Pearl Valley Cheese was founded by Swiss immigrant Ernest Stalder and has remained a family-owned business ever since. Located in Fresno, Ohio, just outside Holmes County, the heart of Amish Country, the company still follows many of the same methods and recipes that Ernest used nearly a century ago.
Today, the fourth generation of the Stalder family continues to oversee the business, maintaining a firm commitment to quality, consistency, and community values. This dedication has helped Pearl Valley become one of the most respected names in Ohio cheese making.
Image Courtesy of Pearl Valley Cheese
Award-Winning Swiss Cheese
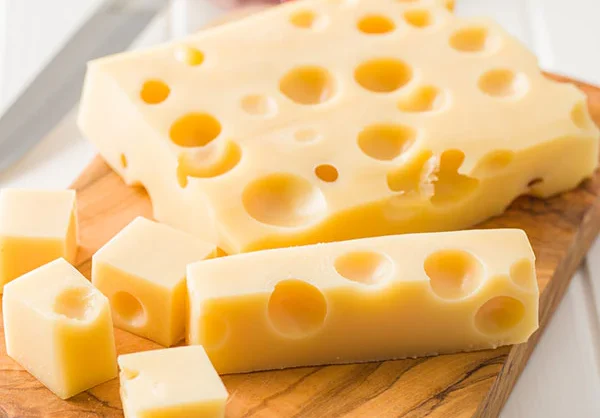
The signature product at Pearl Valley Cheese Ohio is their classic Swiss cheese—famous for its creamy texture, mild nutty flavor, and iconic holes. Made with milk from local, pasture-raised cows, their Swiss cheese has won multiple national and state awards, including honors from the World Championship Cheese Contest and the Ohio State Fair.
In addition to Swiss, the company offers a wide range of cheeses including:
Each variety is made with care, using time-tested techniques that result in authentic, flavorful products.
What Makes Pearl Valley Cheese Ohio Special?
One reason Pearl Valley Cheese stands out is their commitment to using only the freshest local milk, delivered daily from small, family-run farms. This not only supports the local agricultural economy but ensures top-tier quality in every batch of cheese.
Visitors to the Pearl Valley Cheese factory can watch the cheese-making process through large viewing windows and sample their fresh cheeses at the on-site retail store. It’s a must-visit stop on any tour of Ohio’s Amish Country.
Where to Find Pearl Valley Cheese
You can purchase Pearl Valley Cheese products directly at their factory store in Fresno or order online through specialty retailers like Cheesehouse.com’s Pearl Valley Collection, which offers a curated selection of their most popular cheeses for nationwide shipping.
Looking for a gift? Check out the Cheese Gift Boxes section for perfect holiday or corporate gifting options that showcase the best of Amish Country cheese.
Final Thoughts
Pearl Valley Cheese Ohio is more than just a cheese company—it’s a testament to tradition, family heritage, and the art of quality cheese making. Whether you’re a local resident or visiting Holmes County for the first time, a bite of Pearl Valley’s award-winning Swiss cheese is a taste of Ohio’s finest.

Exploring the Amish in Holmes County Ohio: Culture, Community & Tradition
The Amish in Holmes County Ohio: A Living Tradition
Holmes County, Ohio, is home to the largest population of Amish in the United States. The Amish in Holmes County Ohio represent a vibrant and deeply traditional way of life that continues to draw visitors from across the country. With rolling hills, horse-drawn buggies, and handmade goods, Amish Country offers a peaceful, culturally rich experience rooted in simplicity, faith, and community.
A Brief History of the Amish in Holmes County
The Amish first arrived in Holmes County in the early 1800s, seeking religious freedom and fertile farmland. Originating from Switzerland and Germany, the Amish are part of the Anabaptist movement, which emphasizes adult baptism, pacifism, and separation from worldly influences.
Over generations, the Amish in Holmes County Oh
io have maintained their beliefs and way of life despite the pressures of modern society. Today, the county is home to more than 36,000 Amish residents, making up about half the county’s total population.

Photo by Randy Fath on Unsplash
A Way of Life Rooted in Faith
At the heart of Amish life is faith, family, and community. The Amish adhere to a code of conduct called the Ordnung, which governs everything from dress and technology to social behavior and business practices. Most Amish in Holmes County belong to the Old Order Amish, the most conservative group, known for rejecting electricity, cars, and modern technology.
Amish homes are simple but well-kept. Families are large, often with 7 to 10 children, and education typically ends at 8th grade. Children then begin learning trades or farming skills at home. Church services are held in homes and rotated among community members, reinforcing strong social bonds.
Agriculture, Craftsmanship, and Business
Farming is central to the Amish economy, but over time, many Amish in Holmes County have diversified into craftsmanship and small business. You’ll find Amish-owned furniture shops, bakeries, quilt stores, and markets offering homemade cheeses, preserves, and handwoven goods.
Holmes County Flea Market, Amish Country Theater, and Yoder’s Amish Home are just a few popular attractions that give insight into Amish life. However, many Amish prefer to remain out of the spotlight, and visitors are encouraged to observe their customs respectfully, including not taking photographs of Amish people, which is considered intrusive.
Visiting Amish Country in Holmes County Ohio
Tourism plays a major role in the region’s economy. Visitors are drawn to the peaceful rural atmosphere, horse-drawn buggies, roadside produce stands, and traditional meals at local restaurants like Der Dutchman and Boyd & Wurthmann.
Key attractions include:
-
Berlin, OH – The heart of Amish Country, full of quaint shops and bakeries
-
Walnut Creek – Known for its scenic views and antique stores
-
Millersburg – The county seat with historical landmarks and cozy inns
-
The Farm at Walnut Creek – A family-friendly spot to see farm animals and learn about Amish farming
Driving through the winding backroads offers a real sense of the beauty and simplicity of life among the Amish in Holmes County Ohio.

Respecting Amish Customs
While the Amish are welcoming and friendly, it’s important to approach your visit with sensitivity. Here are a few simple guidelines:
-
Don’t photograph people – It goes against their religious beliefs
-
Drive carefully – Horse-drawn buggies share the roads
-
Dress modestly – Especially if visiting farms or family-run shops
-
Ask before entering private property – Some businesses are home-based
Understanding and respecting these practices ensures a more meaningful experience and supports sustainable tourism in the region.
Why the Amish in Holmes County Ohio Matter
The Amish in Holmes County Ohio offer a living example of how tradition and community values can endure in a rapidly changing world. Their quiet resistance to modern technology, deep religious faith, and commitment to one another create a culture that many admire and seek to understand.
As more people search for simplicity and purpose in their own lives, the lessons from Amish Country—slower living, meaningful work, and close-knit community—resonate deeply. Whether you’re a first-time visitor or a returning traveler, Amish Country invites you to unplug, slow down, and reconnect with the essentials.
Final Thoughts
Exploring the Amish in Holmes County Ohio is not just a scenic getaway—it’s a cultural experience unlike any other. With its timeless traditions, scenic farms, and warm hospitality, Holmes County is a place where the past is still very much alive. Whether you’re looking for handmade goods, peaceful countryside drives, or a deeper understanding of a unique American subculture, Amish Country has something truly special to offer.
Would you like to try some of our Amish made and inspired delicacies? Try our Amish Country Sampler Gif Box

The Rich History of Streb Meats: Ohio’s Family-Owned Meat Legacy
The Rich History of Streb Meats
Founded in 1936 by Victor Streb, Streb Meats began as a humble meat processing operation on the family farm along Hackett Road in Dalton, Ohio. What started as a small-scale local service has since grown into one of the region’s most respected names in smoked and specialty meats.
From the beginning, Victor was committed to two things: quality and community. He built the business on delivering fresh, local products and establishing strong relationships with local grocers. In fact, Streb’s began as a “store door” distributor—meaning they delivered directly to grocery stores using their own fleet of trucks. This ensured unmatched freshness and reliability in every delivery.
Growth and Expansion
By the mid-1980s, demand for Streb products had grown beyond what the original location could handle. In 1986, the company moved to a larger facility near State Route 30. This modern meat processing plant allowed for increased production, improved efficiency, and easier distribution to a growing customer base.
Despite the expansion, Streb Meats remained a family-run business, with successive generations maintaining Victor’s high standards for product quality and customer care. The brand became especially known for
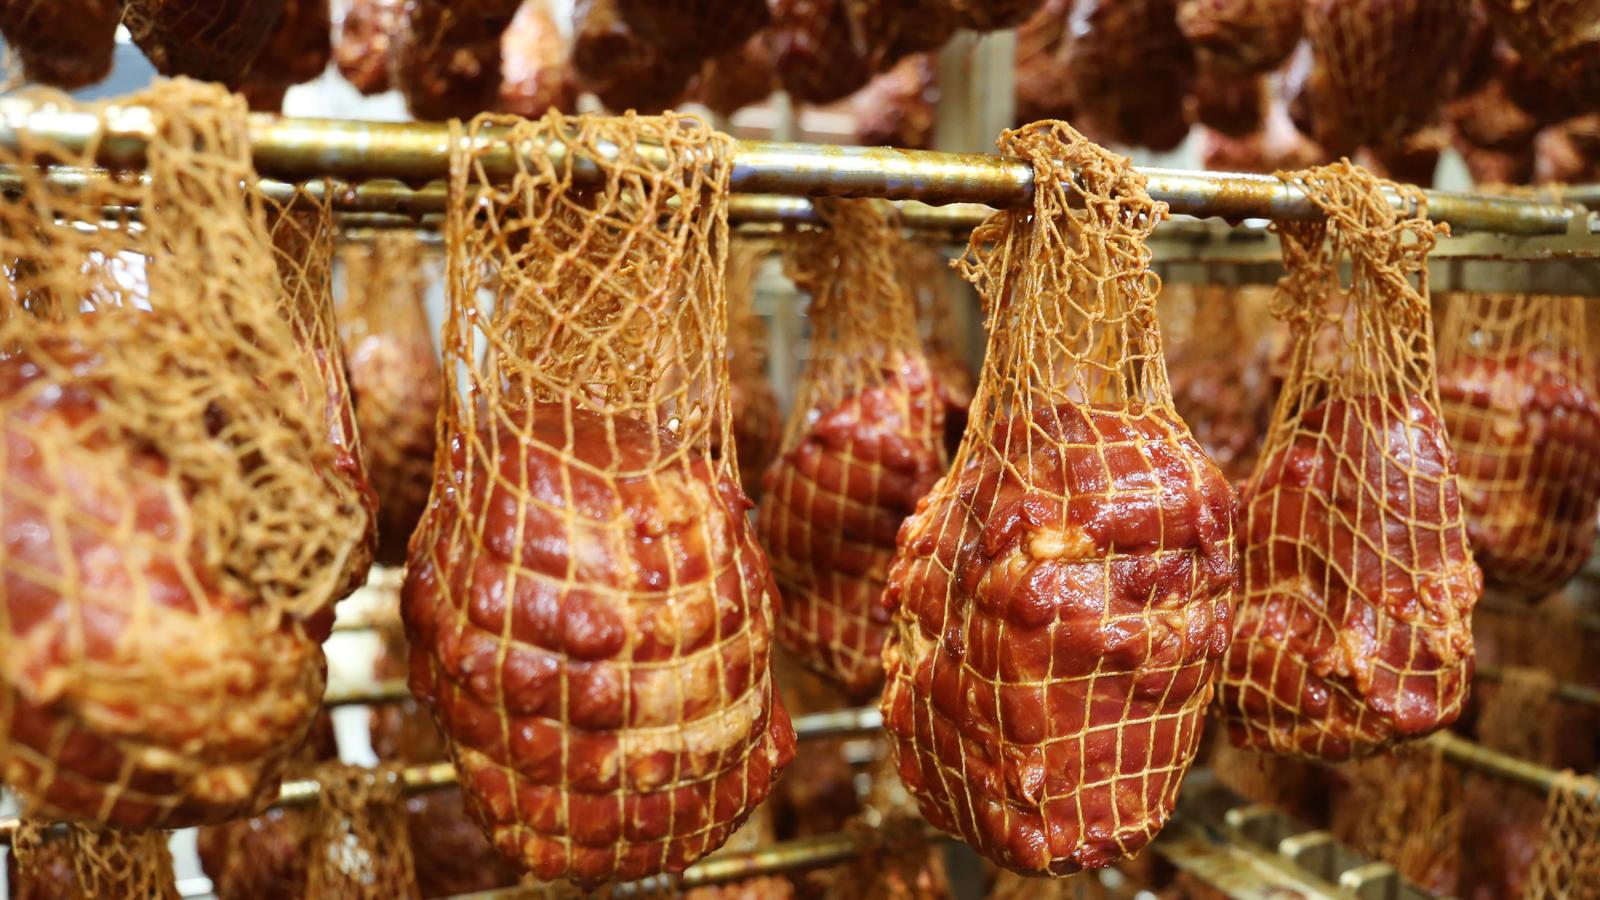
Streb Meats Ham. Courtesy of https://www.strebmeats.com/
its hickory-smoked meats and locally raised pork products, which developed a loyal following throughout Ohio and beyond.
A Legacy Preserved
In December 2021, Streb Meats experienced a major milestone when Coblentz Distributing Inc., better known as Walnut Creek Foods, acquired parts of the business. This included the Streb’s brand, the popular meat sticks, and the specialty ham line.
However, this wasn’t the end of the Streb family’s involvement. The family retained rights to certain products and continued operating at the Dalton facility, ensuring their rich legacy remained intact. Their continued presence in the local market underscores a commitment to the community and to the product excellence that customers have relied on for generations.
Today’s Streb Meats
Today, Streb Meats is a symbol of Ohio’s agricultural roots and dedication to artisan food. Whether it’s their famous smoked sausage, ham products, or the increasingly popular meat sticks, Streb Meats represents quality, tradition, and family values.
Their products are now available through various local retailers and specialty food stores, including Cheesehouse.com, and remain a staple in many Ohio homes, especially during holidays and celebrations.
Conclusion
From a farmhouse operation to a beloved Ohio institution, Streb Meats has proven that hard work, family values, and dedication to quality can build a lasting legacy. Nearly 90 years after its founding, Streb Meats continues to satisfy customers with the same passion and care that Victor Streb started with back in 1936.
*Images courtesy of strebmeats.com
**Hungry? Shop for Streb’s Ham, Bacon, Sausage, and infamous Cracklins’ on our website.

How To Create a Christmas Sweet Treat Table
How To Create a Christmas Sweet Treat Table
Transform your celebration into a magical experience with a Christmas sweet treat table showcasing the season’s finest flavors.
This table will captivate your guests, from indulgent chocolates to sugar-free delights, offering something for every taste. Here’s your ultimate guide to crafting a dessert spread featuring Heggy’s signature confections and creative tips to elevate the presentation.

Choose the Star Treats
Your sweet table’s charm lies in the selection of irresistible treats. For a balanced mix, include:
- Chocolate buckeyes: These peanut butter and chocolate delights are a classic crowd-pleaser.
- Heggy’s haystacks: A crunchy, sweet-salty combination of pretzels coated in creamy chocolate.
- Heggy’s milk chocolate brownie creams: Luxuriously rich and perfect for brownie lovers.
- Heggy’s chocolate-covered raspberry creams: A fruity twist wrapped in decadent chocolate.
- Heggy’s milk chocolate peanut clusters: Nutty, crunchy, and satisfyingly sweet.
- Sugar-free mint meltaways: Guilt-free treats with a refreshing minty flavor.
- Sugar-free chocolate caramels: A chewy, indulgent delight minus the sugar.
- Heggy’s walnut caramels: A perfect addition for texture and flavor variety.
Plan the Presentation
A well-curated layout makes your table a visual and gastronomic delight. Here’s how to arrange it:
1. Choose a theme
Go for a festive theme, like “Winter Wonderland” with snow-white accents, or “Traditional Christmas” featuring reds, greens, and gold. Use themed tablecloths, runners, or garlands to set the tone.
2. Vary heights and layers
Use cake stands, tiered platters, and decorative bowls to create levels. This not only adds visual interest but also makes the treats more accessible.
3. Divide and conquer
Group similar items together for easy navigation. Arrange chocolates, sugar-free options, and nuts in distinct sections with labeled name cards for an elegant touch.
Add Extra Festive Flair
Add in decorative elements to tie the look together:
- Twinkling lights: String fairy lights around the table for a magical glow.
- Seasonal greenery: Add sprigs of pine, holly, or rosemary to bring natural warmth.
- Edible decorations: Use candy canes, gingerbread cookies, or chocolate ornaments to accent the table.
Sweet Pairings
Complement your treats with beverages like hot cocoa, coffee, or spiced cider. Think about creating a mini drink station beside the table for added convenience.
Accommodate Dietary Needs
Adding sugar-free options makes sure no one feels left out. Clearly label these items to guide guests with dietary preferences or restrictions.
Encourage Takeaways
Provide festive goodie bags so guests can take a piece of the magic home. Add personalized tags so that everyone feels special.
Final Touches
Before the party, make sure everything is neatly arranged and fresh. Refill empty spaces as guests enjoy the treats to keep the table looking inviting.
With a touch of creativity and the delicious charm of our confections, your Christmas sweet treat table will become the highlight of the holiday celebration. Let this joyful spread bring smiles, sweet memories, and festive cheer to your home!

The Ultimate Christmas Wreath With Cheese
Looking for a show-stopping appetizer that’s as pretty to look at as it is to eat? This Christmas wreath with cheese is the perfect centerpiece for your holiday gathering.
Made with a medley of cheeses, fresh herbs, and seasonal garnishes, it’s easy to assemble and irresistibly delicious.

If you loved this recipe, check out our Christmas breakfast ideas, plus this recipe for white cheddar and apple scones.
Recipe
Here’s what to round up to make this festive Christmas wreath with cheese, plus the exact steps to making it:
Ingredients
- 8 oz cream cheese, softened
- 4 oz goat cheese
- 1 cup shredded sharp cheddar cheese
- 2 tbsp fresh chives, chopped
- 1 tsp garlic powder
- 1/2 tsp smoked paprika
- Fresh herbs for garnish (rosemary, thyme, parsley)
- Cherry tomatoes or red grapes (for “berries”)
- Crackers, breadsticks, or veggie sticks for serving
Optional toppings:
- Toasted nuts (like pecans or almonds)
- Dried cranberries
- Pomegranate seeds
Instructions
1. Mix the cheese base: In a mixing bowl, combine the cream cheese, goat cheese, shredded cheddar, chives, garlic powder, and smoked paprika. Use a hand mixer or spatula to blend until smooth and well combined.
2. Shape the wreath: Place a sheet of parchment paper on your serving platter. Spoon the cheese mixture onto the center and form it into a circular wreath shape, leaving a hollow center. Smooth the edges using a spatula or damp hands.
3. Chill the wreath: Refrigerate the cheese wreath for at least 1 hour to firm up. This makes it easier to decorate and serve.
4. Decorate with herbs and garnishes: Remove the wreath from the fridge and carefully transfer it to your serving platter (if it isn’t already there). Arrange sprigs of fresh rosemary, thyme, or parsley around the edges of the cheese ring to mimic evergreen branches.
5. Add holiday “berries”: Use cherry tomatoes or red grapes as your “berries,” tucking them in among the herbs. For extra sparkle, add pomegranate seeds or sugared cranberries.
6. Finish with optional toppings: Sprinkle toasted nuts or dried cranberries over the top for added texture. You can even drizzle a little honey for a sweet-savory touch.
7. Serve and enjoy: Surround your cheese wreath with an assortment of crackers, breadsticks, or veggie sticks for dipping and spreading. Encourage guests to scoop up a little of everything for a burst of flavor in every bite.
Tips for Success
Here are our tips for getting the best results:
- Make ahead: Prepare the cheese wreath up to two days in advance and decorate just before serving.
- Customize the flavors: Swap out cheddar for Gouda or add crumbled blue cheese for an extra punch.
- Keep it fresh: Garnish with herbs right before serving to keep them vibrant.
This Christmas wreath with is more than an appetizer—it’s a conversation starter. Whether you’re hosting a cozy family gathering or an elegant holiday soirée, it’s guaranteed to bring smiles and festive cheer to your table.
Serving Idea:
Pair the wreath with a glass of sparkling wine or your favorite holiday mocktail for an elevated experience. Cheers to the holidays and happy entertaining!

Christmas Breakfast Ideas With Cheese
Christmas Breakfast Ideas With Cheese
Make a festive spread to remember with our Christmas breakfast ideas with cheese. From sweet to savory, this list will have you covered!

Savory Options
- Cheesy egg and sausage casserole
A hearty baked dish layered with eggs, breakfast sausage, and loads of shredded cheddar or Gruyère. - Cheese-stuffed croissants
Flaky croissants filled with brie, cream cheese, or Gruyère, baked until golden. - Spinach and cheese breakfast strata
A layered bread casserole with spinach, eggs, and a mix of Parmesan and mozzarella. - Cheddar and chive scones
Fluffy scones packed with sharp cheddar and a touch of fresh chives. - Caprese breakfast sandwich
Fresh mozzarella, tomato slices, basil, and a drizzle of balsamic glaze on a toasted English muffin. - Ham and cheese puff pastry pockets
Puff pastry filled with diced ham, cream cheese, and Swiss or Gruyère. - Cheesy potato hash
Crispy potatoes tossed with melty cheddar or Pepper Jack and topped with poached eggs. - Baked brie and cranberry pastry cups
Mini puff pastry cups filled with brie, cranberry sauce, and a sprinkle of pecans. - Cheese and herb frittata
A simple yet elegant egg dish with goat cheese, feta, or ricotta and fresh herbs. Mix in a little pumpkin butter into the egg filling. - Everything bagel breakfast pizza
Bagel halves topped with cream cheese, scrambled eggs, cheddar, and bacon crumbles.
Sweet Cheese-Inspired Options
- Ricotta pancakes with honey
Light and fluffy ricotta pancakes drizzled with honey and topped with fresh berries. - Cheesecake-stuffed French toast
Thick slices of bread filled with sweetened cream cheese and dusted with powdered sugar. - Cheese Danish pastries
Classic puff pastry filled with sweetened cream cheese and topped with fruit or jam. - Apple and brie Puff pastry braid
A stunning breakfast centerpiece filled with brie, thinly sliced apples, and a touch of cinnamon sugar. - Savory- sweet cheese board
A breakfast twist on a charcuterie board featuring soft cheeses, fruits, nuts, bagels, and spreads.
Our Top Tips for a Festive Spread
We’ve broken these up into menu and general tips:
Tips for a Great Christmas Breakfast Menu
- Plan a balanced menu: Include a mix of sweet and savory items. For example, pair pancakes or pastries with egg-based dishes or casseroles. Add a variety of textures: crispy (bacon, croissants), creamy (yogurt, cheeses), and fluffy (waffles, frittatas).
- Incorporate holiday colors: Use red and green ingredients like cranberries, pomegranates, strawberries, spinach, and basil to create a festive look. Garnish dishes with edible holiday touches such as rosemary sprigs or powdered sugar “snow.”
- Have that one showstopper dish: Make one centerpiece dish, like a baked brie wreath or a Christmas tree-shaped pull-apart bread, to wow your guests.
- Prepare ahead: Choose recipes that can be made or prepped the night before, like breakfast casseroles, overnight oats, or muffin batter. Lay out serving dishes, utensils, and decorations the evening prior.
- Incorporate cheese: We are biased, but….everyone loves cheese! Right? Check out our full range here.
- Serve seasonal drinks: Prepare a festive beverage menu featuring items like cranberry mimosas, eggnog, or spiced apple cider.
- Keep portions small: Offer bite-sized portions for variety and ease, such as mini quiches, slider-style breakfast sandwiches, or muffin tin casseroles.
- Use decorative serve ware: Go for holiday-themed plates, napkins, and serving trays to tie the theme together.
- Have DIY options: Set up stations:
- Bagel bar: Include cream cheese, smoked salmon, sliced veggies, and festive toppings.
- Pancake or waffle station: Offer syrups, fresh fruit, whipped cream, and sprinkles.
- Hot chocolate bar: Provide cocoa, marshmallows, whipped cream, peppermint sticks, and chocolate shavings.
General Tips for a Great Christmas Breakfast
- Make it interactive: Include a group activity to enhance the experience, like decorating Christmas cookies or building a gingerbread house after breakfast.
- Label dishes: Add small cards to identify each dish, mainly if you include allergy-friendly or gluten-free options.
- Add personal touches: Include handwritten thank-you notes or mini Christmas crackers at each place setting to make guests feel special.
- Don’t forget the kids: Offer kid-friendly options like fruit skewers, yogurt parfaits, or Christmas-shaped pancakes with fun toppings.

The Best Sides With Boneless Smoked Ham
The Best Sides With Boneless Smoked Ham
Make a classic festive meal with our list of the best sides with boneless smoked ham. Nothing screams holiday time louder than juicy, tender ham. Well, maybe turkey does, but they’re both pretty festive.

9 Ideas for Sides with Boneless Smoked Ham
Here’s a list of what we think goes really well with our boneless smoked ham:
- Garlic mashed potatoes: Boil potatoes with garlic until tender, then mash with butter and milk for a creamy texture—season with salt and pepper.
- Roasted Brussels sprouts with balsamic glaze: Toss Brussels sprouts in olive oil, salt, and pepper, then roast until crispy. Drizzle with a homemade balsamic glaze made by reducing balsamic vinegar and honey.
- Honey-glazed carrots: Steam or boil carrots until tender, then toss in a simple glaze made with melted butter and honey. Season to taste.
- Crispy roasted sweet potatoes: Cube sweet potatoes, toss them with olive oil, paprika, salt, and pepper, and roast at a high temperature until crispy and tender.
- Green bean almondine: Steam or blanch green beans, then sauté them in butter with sliced almonds and a splash of lemon juice.
- Cranberry sauce: Simmer fresh cranberries with sugar, orange juice, and zest until the berries burst and the sauce thickens.
- Buttered corn on the cob: Boil corn until tender and drizzle with melted butter, seasoning with salt and pepper.
- Cheese and herb stuffing: Combine cubed bread, shredded cheese, sautéed onions, sage, and chicken broth, then bake until golden and crispy.
- Garlic bread: Spread a mixture of softened butter, garlic, and parsley on French bread, then bake until golden and fragrant.
How To Reheat Boneless Smoked Ham for Christmas

White Cheddar and Apple Scones
White Cheddar and Apple Scones
These savory-sweet white cheddar and apple scones combine sharp white cheddar with tart apple for a perfect addition to your holiday menu.
Make them as a Christmas morning treat or side for your festive spread.

Hunting for more cheesy-based recipes? Try our Smoked Horseradish Cheese Gratin, this blue cheese tart, or our artichoke and goat’s cheese dip.
White Cheddar and Apple Scones Recipe
These apple and cheddar scones are easier to whip up than you’d think. Here’s how:
Ingredients
- 2 cups all-purpose flour
- 1 tbsp baking powder
- 1 tbsp granulated sugar
- ½ tsp salt
- ½ tsp ground cinnamon
- 6 tbsp cold unsalted butter, cubed
- 1 cup sharp white cheddar cheese, shredded
- 1 medium tart apple ( Granny Smith), peeled, cored, and finely diced
- ¾ cup heavy cream (plus extra for brushing)
- 1 large egg
Instructions
- Preheat and prep: Preheat the oven to 400°F (200°C). Line a baking sheet with parchment paper.
- Mix dry ingredients: In a large bowl, whisk together the flour, baking powder, sugar, salt, and cinnamon.
- Cut in butter: Add the cold butter cubes to the dry ingredients. Use a pastry cutter or your fingertips to work the butter into the flour until the mixture resembles coarse crumbs.
- Add cheese and apple: Stir in the shredded white cheddar and diced apple, making sure they are evenly distributed.
- Combine wet ingredients: In a small bowl, whisk together the heavy cream and egg. Pour the wet mixture into the dry ingredients, stirring gently until a shaggy dough forms.
- Shape the dough: Turn the dough out onto a lightly floured surface and gently knead it a few times to bring it together. Pat the dough into a 1-inch-thick round and cut into 8 wedges, or use a round cutter to shape individual scones.
- Prepare for baking: Place the scones on the prepared baking sheet, spacing them slightly apart. Brush the tops with heavy cream for a golden finish.
- Bake: Bake for 18–22 minutes, or until the scones are golden and firm to the touch.
- Cool and serve: Let the scones cool slightly on a wire rack before serving. Enjoy warm or at room temperature.
4 Tips for Perfect White Cheddar and Apple Scones
- Use cold ingredients: Keep the butter, cheese, and cream cold to get flaky layers.
- Don’t overmix: Stir the dough until just combined to avoid tough scones.
- Dice apples small: Finely dice the apple to evenly distribute the flavor and prevent large chunks from breaking the dough.
- Make ahead: Shape the scones, then freeze them unbaked. Bake directly from frozen, adding 2–3 minutes to the baking time.
Storage Notes
Store scones in an airtight container at room temperature for up to 2 days. For longer freshness, refrigerate for up to 5 days.
Freeze baked scones for up to 2 months. Thaw at room temperature and warm in the oven before serving.

Smoked Horseradish Cheese Gratin (The Perfect Potato Side)
Smoked Horseradish Cheese Gratin
Smoked horseradish cheese gratin is delicious with roasted meats like turkey or ham. It pairs beautifully with a crisp green salad to balance the rich flavors.

Make a batch of indulgent potato gratin layered with creamy smoked horseradish cheese as a show-stopping side dish perfect for your Christmas feast.
Smoked Horseradish Cheese Gratin Recipe
Round-up your ingredients and get cooking!
Ingredients
- 2 lbs (about 5 medium) Yukon Gold potatoes, thinly sliced
- 1 ½ cups smoked horseradish cheese, grated
- 1 ½ cups heavy cream
- 2 garlic cloves, minced
- 1 tsp fresh thyme leaves (or ½ tsp dried thyme)
- ½ tsp salt
- ½ tsp black pepper
- 2 tbsp unsalted butter, softened (for greasing the dish)
- ¼ cup breadcrumbs (optional, for topping)
Instructions
- Preheat the oven: Preheat your oven to 375°F (190°C). Grease a 9×13-inch baking dish with the softened butter.
- Prepare the potatoes: Wash and peel them, then slice them thinly (about ⅛ inch thick) using a mandoline or a sharp knife.
- Make the cream mixture: Warm the heavy cream over low heat in a small saucepan. Stir in the minced garlic, thyme, salt, and pepper. Heat until just warm but not boiling.
- Assemble the gratin:
- Layer one-third of the potato slices evenly in the prepared baking dish.
- Sprinkle one-third of the smoked horseradish cheese over the potatoes.
- Pour one-third of the warm cream mixture over the layer.
- Repeat with two more layers, finishing with the cheese and cream on top.
- Optional topping: If you like, sprinkle breadcrumbs over the top for a crispy finish.
- Bake: Cover the dish with foil and bake in the preheated oven for 40 minutes. Remove the foil and bake for an additional 20–25 minutes, or until the top is golden brown and the potatoes are tender when pierced with a knife.
- Serve: Let the gratin cool for 10 minutes before serving. Garnish with extra thyme.
This dish pairs beautifully with roast meats or as a centerpiece on a vegetarian holiday table.
10 Tips for Perfect Smoked Horseradish Cheese Gratin
Here are our top 10 tips for getting the best out of this recipe:
- Choose the right potatoes: Yukon Gold potatoes are ideal for gratins thanks to their creamy texture and ability to hold their shape. If unavailable, Russet potatoes are a good substitute.
- Slice uniformly: Use a mandoline slicer for evenly thin potato slices. This makes sure they cook evenly.
- Don’t skip the butter: Greasing your baking dish with butter prevents sticking and adds a rich, golden finish to the edges.
- Warm the cream: Heating the cream mixture before pouring it over the potatoes helps the flavors meld and reduces the overall baking time.
- Layer cheese generously: Distribute the smoked horseradish cheese evenly in each layer for a consistent, smoky flavor in every bite.
- Cover and uncover strategically: Cover with foil during the initial bake to trap steam and soften the potatoes. Remove the foil for the last 20–25 minutes to achieve a golden, bubbling crust.
- Check for doneness: Pierce the center of the gratin with a sharp knife. If it slides through effortlessly, the potatoes are fully cooked.
- Let it rest: Leave the gratin to cool for 10 minutes after baking. This helps the layers set, making it easier to serve.
- Boost flavor: Add a pinch of nutmeg or smoked paprika to the cream mixture for an extra layer of flavor.
- Crispy top hack: For an ultra-crispy topping, broil the gratin for 2–3 minutes after baking. Watch carefully to avoid burning.
Storage Notes
Store leftovers in an airtight container in the fridge for up to 3 days. Warm in a 350°F (175°C) oven until heated through, or microwave individual portions.
For longer storage, freeze fully cooled gratin in a freezer-safe dish for up to 2 months. Thaw overnight in the fridge before reheating.

