Search Results for: jam
How to Make Jam
We absolutely love jam here at Shisler’s Cheese House. It’s great for spreading on toast, eating in sandwiches or incorporating into your baking.
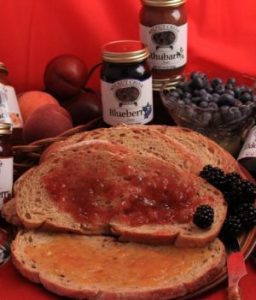
Today we thought we would introduce you to the basic jam making technique. You’ll need:
- Jars to store your finished product
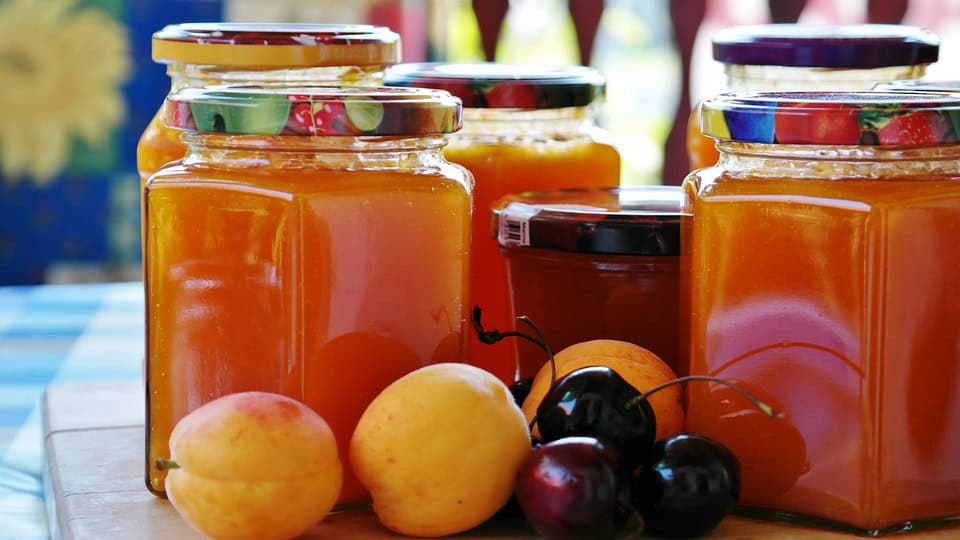
- An equal weight of fruit and granulated sugar – some great fruit choices include strawberries, raspberries, cherries, or peaches. You can even combine fruits to try out new flavors. Just be sure to weigh all of the fruit together to get the right weight for the sugar.
- A large pan
- Start by sterilizing your jars. You can do this in a variety of ways, but the easiest is to wash your jars thoroughly in soapy water, rinse them, and then place them into an oven on a very low heat to dry them out.
- Put the fruit and sugar into your pan on a very low heat and stir until all the sugar is dissolved.
- Bring the fruit mixture up to a rapid, rolling boil and cook for 3-5 minutes. As your jam approaches the setting point, it will begin to thicken and start to boil more slowly.
- To test if the jam has reached setting point, remove the pan from the heat. Spoon a little of the fruit onto a cold plate, leave it to cool for a few minutes, and then push your finger or a spoon into the jam. If the jam wrinkles, it is ready. If not, return the pan to the heat and cook the jam for a minute or two more before testing it again.
- Once the jam reaches its setting point, carefully spoon it into the prepared jars and put the lids on while the jam is still hot. It will thicken as it cools and the jar should seal. If it doesn’t, then the jam should be eaten within a couple of weeks.
- If the jar is sealed, it can be kept for around six months. Once opened, pop it into the fridge to keep it fresh.
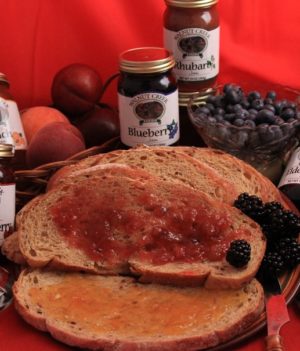
If you don’t feel like making your own, then we have a whole range of jams and jellies ready for you to enjoy. Our homestyle jams from Walnut Creek come in Cherry, Blueberry, Black Raspberry, Rhubarb, Strawberry, Red Raspberry, Strawberry Rhubarb, Peach, Strawberry Kiwi, Apricot, Blackberry, Boysenberry, and Elderberry Jelly. With that many flavors, we know that you’ll find one that you love! We also stock a Private Label Old Fashioned Apple Butter, made from the best locally grown apples and locally produced Amish butter.
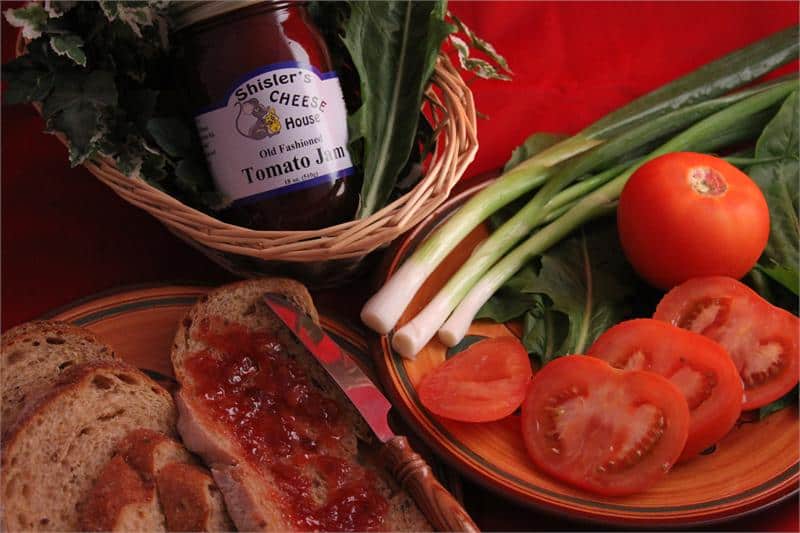
If you prefer savory treats, we offer a Hot Pepper Jelly and our Private Label Tomato Jam. The tomato is a local tradition, made from ripe locally grown flavorful tomatoes. We suggest serving it with our well-aged Canadian Cheddar, but there are many uses. It’s incredible in a BLT or served on cornbread, eggs, and roasted potatoes. The Hot Pepper Jelly is also great with cheese or ham.
How do you make jam? What’s your favorite flavor? Let us know in the comments below!
10 Uses for Jams and Jellies
Whether you love trying different jams and jellies, or you have made lots yourself, sometimes you need to find a way to use some up. Especially at this time of year, when you’ll be thinking about making new jams with all of the lovely summer fruit.
Read on to find out some of our tips and tricks for using up jams and jellies.
- Cakes
You don’t always have to use strawberry or raspberry jam to sandwich cakes together. Try out different flavor combinations and find your favorites.
- Gravy
This might sound a little odd, but trust us: it’s delicious. A little sweetness can go a long way to turning a good gravy into a great gravy. Add a teaspoon at a time and keep tasting; you don’t want to overpower it.
3. Yogurt
Stir jams and jellies into plain yogurt to create a delicious and easy dessert. It’s perfect for when you’re craving something sweet but you don’t want to leave the house.
4. Salad Dressings
Sometimes you might add a little sugar or honey to a salad dressing for sweetness. Try jam instead! Make sure you taste it before pouring it over your salad to make sure that you’ve got the flavors right. A great tip is to take a leaf or veggie from your salad and dip it into the dressing to taste. This way you get to try the flavors together, instead of tasting dressing on its own.
5. Grilled Cheese
We’ve mentioned this before, but jam or jelly can take your grilled cheese to the next level. We especially love this with cheeses like ricotta or mascarpone, but hard cheeses like gouda work well with fruit as well.
6. Barbecue
As the weather warms up and you start to think about cooking on the barbecue, try using jelly as a glaze for meats. Mix your jelly with a little water and heat over a low heat until it is a brushable glaze. Then simply brush it onto the meat.
7. Cocktails
Any cocktail that is shaken can have a spoonful of jam added to it. We especially love apricot jam in a mojito, but this is definitely something to experiment with. Make sure that you give everything a good shake before serving.
8. Pancakes
Pop jams and jellies on the table when you’re serving pancakes and watch them get eaten up! This is especially good with whipped cream.
9. Oatmeal
Oatmeal with a dollop of jam on top is a true joy. Try different flavors to find your favorite. You’ll never have a boring bowl for breakfast again.
10. Biscuits
Sandwich biscuits together with jam or even add a little to the batter to create an added sweetness. This is a quick and easy way to add excitement to your baking. It’s also a fun way to get the kids involved in the kitchen!
We hope you’ve enjoyed our list. If you need some jam or jelly to try out these ideas, we’ve got you covered. Which will you try? Let us know in the comments!
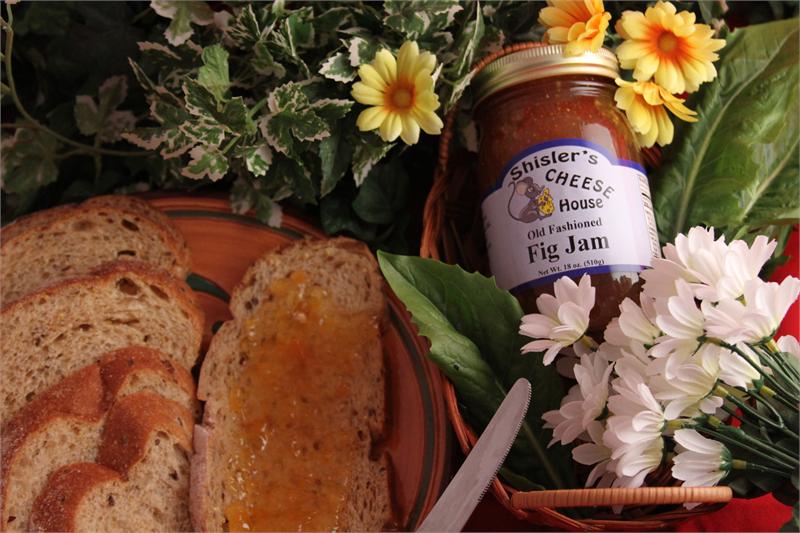
Shisler’s Fig Jam
Fig Jam A sweet and delicious jam made from real figs. If you like strawberry Jam, you’ll love fig jam!
Shisler’s Private Label Tomato Jam (18 Oz.)
Shisler’s Tomato Jam
A local tradition made from ripe locally grown flavorful tomatoes, never the commercially grown bland variety. We suggest serving this tomato jam with our well-aged Canadian Cheddar, but there are many uses. You can make a BLT with it. It’s incredible on cornbread, eggs, and roasted potatoes.
A Quick Look at the History of Cheese Making Through the Ages
The history of cheese is as rich and varied as the many types of cheese we enjoy today. Cheese-making likely began over 7,000 years ago in the Fertile Crescent, a region that spans modern-day Middle East and North Africa.

Though the exact origins remain shrouded in mystery, it is widely believed that cheese was discovered accidentally.
Early farmers stored milk in containers made from animal stomachs, which contained the enzyme rennet. This enzyme caused the milk to coagulate and separate into curds and whey, creating the first cheese.
Cheese-making quickly spread across the ancient world, becoming essential for preserving milk.
The Egyptians, Greeks, and Romans all developed their own cheese varieties and techniques, each contributing to the art and science of cheese-making. Cheese was so valued in ancient times that it was often used as a form of currency or as a tribute to the gods.
Cheese in the Roman Empire: An Age of Experimentation
The Romans were instrumental in spreading cheese-making knowledge throughout Europe. As the Roman Empire expanded, so did the diversity of cheese production.
The Romans were known for playing around and experimenting with different types of milk (including sheep, goat, and cow) and various aging techniques. They also introduced the concept of hard and soft cheeses, with more than 20 types recorded by the first century A.D.
Roman soldiers carried cheese as a portable and nutritious food, which helped further disseminate cheese-making techniques across Europe.
As Roman influence waned, these practices were absorbed and adapted by the various cultures that emerged in Europe. This led to the development of the regional cheeses we know today. Examples are Parmigiano-Reggiano in Italy and Roquefort in France.
The Middle Ages: Monastic Influence on Cheese-Making
The Middle Ages marked a significant period in cheese-making history, particularly within European monasteries. Monks were crucial in preserving and advancing cheese-making techniques during this era.
They experimented with aging processes, bacteria cultures, and various types of milk to create some of the most beloved cheeses still enjoyed today.
Monasteries became centers of cheese production, and many of the cheeses developed during this time are still produced similarly. For example, cheeses like Brie, Camembert, and Munster owe their existence to monastic ingenuity.
The strict rules and traditions of monastic life also ensured that cheese-making techniques were passed down through generations with little alteration, preserving the quality and authenticity of these cheeses.
The Renaissance and Beyond: Cheese as a Culinary Staple
The Renaissance renewed interest in gastronomy, and cheese became a key ingredient in European cuisine. As trade routes expanded, cheese was introduced to new regions and became an important part of the diet across the continent.
New varieties emerged as cheese-makers experimented with different aging processes, molds, and spices.
During this period, cheese also began to gain recognition beyond Europe. European settlers brought cheese-making techniques to the New World. This is where new types of cheese, like Cheddar and Monterey Jack, were developed.
The industrial revolution in the 19th century further transformed cheese-making. This introduced mass production techniques that made cheese more accessible to a growing population.
Modern Cheese-Making: Tradition Meets Innovation
Today, cheese-making is a global industry that blends ancient techniques with modern technology. While many cheeses are still made using traditional methods, innovations in cheese-making have created new varieties and flavors.
The rise of artisanal cheese-making has also sparked a renewed interest in traditional methods and local ingredients, leading to a resurgence of regional cheeses that were once at risk of disappearing.
Wrapping Up The History Of Cheese
We hope this article gave you more insight into the wonderful history of cheese! Don’t forget to check out our range of cheeses, meats, and jams/jellies.
An Easy Summer Quiche Recipe
Here is an easy summer quiche recipe you will keep making, full of rich and creamy flavors like bacon and blue cheese.
Once you get the hang of making a good quiche, there will be no stopping you. They are a great way to use veggies, cheeses, and meats and can be made beforehand. Quiches make the perfect summer lunch dish and look impressive as a part of your lunch spread.
For other cheesy homemade recipes, check our nachos post for a quick recipe that oozes tasty flavors.

How to make an easy summer quiche recipe
This recipe can be made simpler and quicker by using a ready-made pastry. The homemade pastry is light and delicious, though, so go ahead and give it a try!
Ingredients
For the pastry
- 250g all-purpose flour
- 125g butter, cold and cubed
- 3 TBS ice cold water
- ¼ tsp salt
For the filling
- 2 leeks, chopped
- 6 strips bacon, diced or chopped
- 120g blue cheese
- 1 sprig of thyme
- 1 clove garlic, chopped
- 6 eggs
- 1 cup heavy cream
- 1/3 cup whole milk
- Salt and pepper
- 1 cup grated garlic cheese
Instructions
Pastry:
- Pulse the flour, salt, and cold butter in a food processor until the mixture resembles crumbs.
- Add the cold water a little at a time. The dough will seem heavy. The mixture will not have come together yet.
- Empty the dough into a large mixing bowl. Lightly bring the dough together into a disc. Wrap it in plastic and rest it in the fridge for 30 minutes.
- Remove the pastry and allow it to come to room temperature. Roll it out on a floured surface. Roll it out into a circle – about 12 inches in diameter. Pinch together any tears or cracks as you go.
- Grease a 9-inch pie dish. Using a rolling pin, lift and lay the pastry over the dish. Tidy the pastry by sealing any cracks or gaps. Chill in the fridge for 20 minutes. Preheat the oven to 400F.
- Remove the pie dish, prick it with a fork, and line it with baking paper and baking beans or beads. Bake for 20 minutes, remove the beans, and bake for another 10 minutes. Remove and cool.
Filling:
- Add the bacon to a pan and saute gently. Once the fat has rendered out, add the leeks and cook them gently with the bacon until soft. Pull the thyme leaves off the stalk and add them to the bacon mixture.
- In a small bowl, add the blue cheese and crumble it with your hands.
- In another large mixing bowl, add 4 whole eggs and 2 egg yolks (retain the whites for an egg-white-only omelet). Lightly break up the eggs. Add the cream and milk and season with salt and pepper.
- Once the bacon mixture has cooled, add it to the egg mix.
- Turn the oven down to 325F.
- Distribute the blue cheese crumbles onto the base of the pastry dish evenly. Pour the egg and cream mixture over and top with the grated cheese.
- Bake the quiche for about 40 minutes until just set.
Other filling ideas
- Goat’s milk cheese, caramelized onion, and baby spinach
- Smoked ham, cranberries, and kale
- Tomato, smoked hot pepper, corn, and parsley
- Glacier Wildfire blue cheese, Shisler’s fig jam and red onion
Wrapping it up
Nothing is more delicious than a creamy, rich quiche with a light and bright summer salad! We hope you will give making your own homemade quiche recipe a try.
All the cheeses and meats mentioned in this post are available with us.
Build The Perfect Charcuterie Board
Build the perfect charcuterie board and cultivate confidence in entertaining.
A beautifully curated charcuterie board is a fun way to show off your meats and cheeses. Here’s how to create a real show-stopper!

Charcuterie board
What Belongs On a Charcuterie Board?
In terms of artistry and taste, creating a balance is key. You want a mix of sweet, savory, salty, and spicy flavors. Visually, create harmony by pairing various colorful and multi-textural ingredients together.
Meats
Cured meats are a key part of your board – try a mix of sliced salami, coppa, ham, or pancetta. Don’t forget to add pieces of sausage like bologna or summer sausage. Thick slices of chorizo add texture and a meaty bite. You could also pop on a pot of chicken liver pate or a terrine.
Cheeses
You want a balance of strong, creamy, tangy, and mild cheeses. Of course, camembert and gouda are popular, as is a lovely piece of blue cheese or manchego.
Don’t forget to add soft goat cheese or feta as a contrast to harder cheeses like pecorino or cheddar.
Accompaniments
Adding fresh fruits like grapes, sliced apples, figs, and berries adds sweetness and contrast to your charcuterie board.
Consider a sprinkle of nuts like toasted almonds or hazelnuts. Condiments like honey, fruit preserves, and jams are also at home on your board, as are mustard and pickles. Adding a few briney ingredients like olives or capers is lovely, too.
Choose two or 3 types of bread or crackers as the vehicles to load up all the tasty treats you’ve laid out. To cater to everyone’s tastes, consider multigrain, gluten-free, crusty, and plain white bread options.
Build The Perfect Charcuterie Board
- Choose your board: opt for a wooden or slate board, a marble slab, or even a large serving tray.
- Begin by placing small bowls on the board to hold condiments such as honey, mustard, or fruit preserves.
- Now, it’s time to arrange the meats. Do this in a way that allows easy access for guests to pick up slices without disturbing the overall presentation.
- Follow up by adding an assortment of cheeses.
- To complete the charcuterie board, add accompaniments that complement the flavors and textures of the meats and cheeses.
- Finally, fill any remaining empty spaces on the board with bread and crackers.
Be creative and use what is in season. Combine trendy ingredients with classic favorites, and everyone will want to tuck in.
Tips To The Best Charcuterie Board
- Adding color: fruits, flowers, and veggies all add pretty pops of color
- Vary the textures and shapes: arrange your meats and cheese in different shapes. Roll the slices, fold pieces, or cut cubes out.
- Choose complimentary pairings, for example:
- Sweet, sour, savory: try this Sour Cherry Bourbon Goat’s Cheese
- Tangy and creamy: pickles and olives with creamy cheeses
Remember, the key to taking your board to the next level is to think beyond the basics and incorporate elements that enhance both the visual appeal and taste experience.
Wrapping It Up
Take a look at our Products Page where you will find loads of options to choose from to build the perfect charcuterie board.
Sweet Fire Goat Cheese (4.5 oz)
Sweet Fire Goat Cheese
This original flavor brings the concept of pepper jam & cheese to this fresh chèvre. While habanero brings the heat, this creamy goat cheese calms it down – all in one bite. Simply open and unmold the cup upside down to let the blackberry habanero syrup coat the goat cheese. Mackenzie Creamery, a local business right here in Ohio continues to win awards and has been cited in The New York Times, Town and Country Magazine, and Cleveland Magazine as one of the best goat cheses in the country. 
Bread Cheese (8-10 oz)
Bread Cheese
Bread Cheese, also known as “baked cheese” is baked to give the cheese a toasted crispy crust. Keto friendly! You could make it less keto friendly by dipping in syrup, slathering it in jam, or alongside your favorite chocolate.

